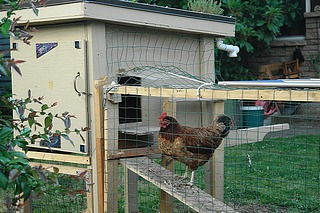
Cleaning a Chicken Coop
Cleaning a chicken coop can seem pretty daunting if you don't know what you're doing. However, it doesn't have to be. There are a few basic methods you can use to keep poultry house cleaning from being a real nightmare.
Do things right and you'll keep the smell down, make cleaning easy and fast, and keep you and your chickens happier and healthier. Let's take a look.
Most chicken coops only need a top to bottom cleaning twice a year. Some coops, using the deep litter method or the sand floor method, require full litter replacement even less often.
Owners of coops using these methods fully clean out their chicken coops once a year or even less often. Even conventional coops don't need much cleaning, however. Just change the bedding once every month or two to make the semi-annual cleaning easier.
No matter which type of bedding method you're using, cleaning a chicken coop has to happen. This is to avoid allowing ammonia to build up. Remember - if you can smell it, so can the chickens - and they have to live in it! Ammonia build up can cause serious respiratory problems in all kinds of animals, so clean your coop whenever it develops a smell.
Poultry house cleaning starts with removing all bedding material from the coop and the nest. This bedding can be composted to produce a rich fertilizer for your garden. If you're doing a full clean, take out the waterers and feeders, too, and sweep out leftover debris.
Once all the bedding is out, you'll need to scrub the coop down with a cleaner of some kind. Make sure it's something that won't remain toxic after use, or you could make your chickens sick.
A mixture of one part bleach and one part dish soap makes a good base. Dilute this in ten parts water, and make enough that you'll be able to thoroughly clean all surfaces. You can also use citrus cleaners.
Do a good job with a scrub brush, and clean everything. That means roosting bars, nest boxes, floors and even the walls. Once you're done, rinse the whole coop with a hose to prevent toxic residues from staying behind.
Wait till the coop has thoroughly dried, then replace the bedding with fresh material and let your chickens back in. Scrub the waterer and feeder out as well, rinse carefully, and let dry completely before refilling them. A long handled scrub brush can be a real help here.
A small coop can be cleaned in just a few hours, and it's easier if you keep up with your spot cleaning. Have friends and family who benefit from your eggs help you, and your chicken coop could be clean in no time.
Just remember to wear old clothes, good shoes, and keep the coop well ventilated while you work. Cleaning a chicken coop doesn't have to be hard.
Time for a New Chicken Coop?
I often get questions about building a new coop. In order to best help you in this area I took the time to preview a couple coop plan resources.
I encourage you to click here and discover my findings.
I know everyone brags about their plans so I wanted to help simplify the process for you. Just click the image below to read my review...

Return From Cleaning a Chicken Coop to Chicken Coop


Custom Search
New! Comments
Have your say about what you just read! Leave me a comment in the box below.